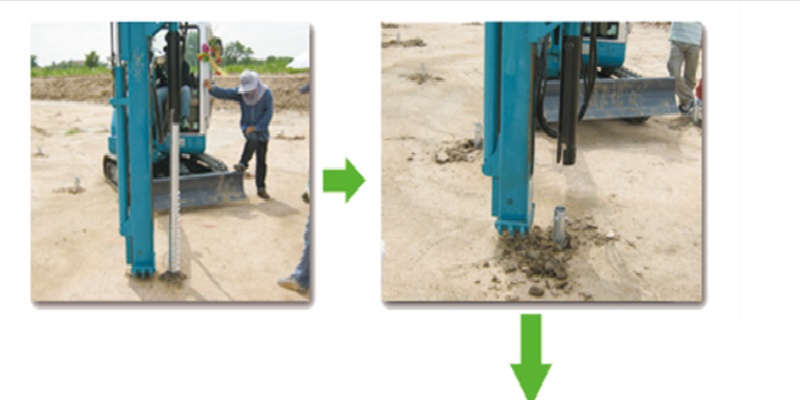
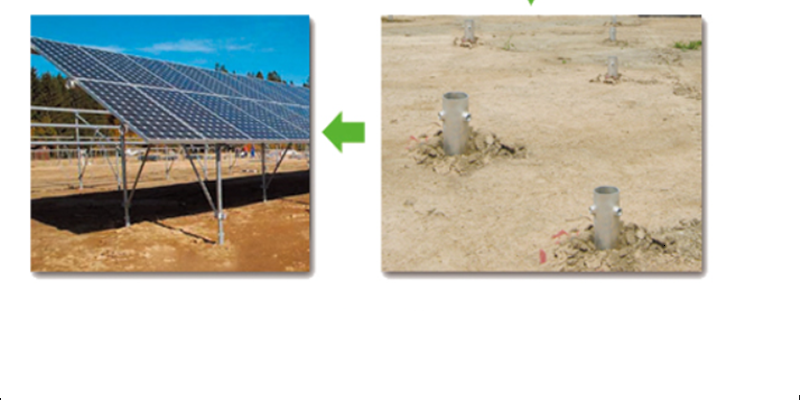
To use a solar ground screw, follow these steps:
1. Choose the location: Select a suitable location for installing the solar ground screw. It should be a flat and stable area with good sun exposure.
2. Dig a pilot hole: Use a post hole digger or an auger to dig a pilot hole in the ground. The depth of the hole should be determined by the length of the solar ground screw you are using.
3. Insert the ground screw: Insert the solar ground screw into the pilot hole. Apply downward pressure while turning it clockwise to screw it into the ground. Use a wrench or a screwdriver to provide additional leverage if necessary.
4. Check for stability: Ensure that the ground screw is firmly secured in the ground. Wiggle it back and forth to verify its stability. If it feels loose, remove it and dig a deeper hole or choose a different location.
5. Attach the solar panel mount: Once the ground screw is securely in place, attach the solar panel mount or racking system to it. Follow the manufacturer's instructions for proper installation.
6. Install the solar panels: After the mount is attached, install the solar panels onto the mount according to the manufacturer's instructions. Connect the panels to the necessary electrical components and wiring to complete the installation.
7. Regular maintenance: Periodically check the stability of the ground screw and monitor the performance of the solar panels. Make sure to keep the area around the ground screw clear of debris to prevent any obstruction to the solar panels.
Remember to consult the specific instructions provided by the manufacturer of the solar ground screw for any additional steps or considerations specific to their product.


